

How Do I Clean Url Cache In Website Host Dns Server
-
Flush DNS Cache
Modern browsers, OS, and DNS clients store cache of IP addresses and other DNS data automatically. When a computer visits a website for the offset time, information technology stores the website's DNS information in the enshroud, and on the next visit of the same website, it looks in the cache to see if the spider web site's information is present to use. An old version of a site opens if the website's DNS information has changed since the figurer's last visit.
Flushing the cache removes all the data stored in the cache, forcing the computer to find the new DNS information for the website. It is usually done to speed up the process and minimize requests for the same hostnames. When IP addresses are inverse, or bad results are buried, its necessary to clear the DNS cache. DNS enshroud can be cleared via control line or from browsers also. Steps to flush DNS Enshroud for major operating systems and browsers are as below.
Contents:
- Windows
- Windows 10
- Windows eight & Windows viii.1
- Windows 7
- Windows XP/NT/2000/98
- MAC OS 10
- macOS 11 (Big Sur)
- macOS ten.15 (Catalina)
- macOS 10.14 (Mojave)
- macOS 10.xiii (High Sierra)
- macOS x.12 (Sierra) and OS X 10.eleven (El Capitan)
- OS X ten.10 (Yosemite)
- OS X ten.9 (Mavericks)
- Os Ten x.7 (King of beasts) and x.8 (Mountain King of beasts)
- Os Ten x.five (Leopard) and ten.6 (Snow Leopard)
- Os 10 10.4 (Tiger)
- Linux
- Ubuntu & Debian
- Others
- Mobile Devices
- iPhone
- Android
- iOS
- TV
- Google Chrome Browser
- For Webmasters/Developers/SysAdmin
- Google DNS Cache
- Cloudflare DNS Cache
- OpenDNS Cache
Windows
How to Flush DNS in Windows 10?
Command Prompt and Windows Powershell, which is a new improver to Windows, can exist used to clear DNS enshroud.
Option 1 – Command Prompt
To reset the DNS resolver cache, perform the following steps:
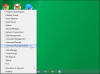
- Click the
Firstbutton, so blazoncmd - Correct-click
Command Prompt, then cullRun as Administrator. - Blazon
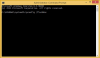
ipconfig /flushdnsso pressEnter. (be certain in that location is a space before the slash)
A command box will flash on the screen for a split second, and the DNS Resolver cache is cleared.
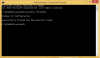
Too, in that location are some other related commands that y'all might exist interested in:
- ipconfig /displaydns: Information technology displays your electric current DNS enshroud under Windows IP configuration.
- ipconfig /registerdns: To annals your DNS cache recorded in the Hosts file.
- ipconfig /release: To release the current IP accost settings.
- ipconfig /renew: To reset and request a new IP accost.
Option 2 – Windows PowerShell
- Select the
Startpush, then typepowershell - Select
Windows PowerShell - Type the following command, and so press Enter:
-
Clear-DnsClientCache
How to Affluent DNS in Windows viii and viii.1?
Considering of the system security policies run cmd as administrator user and follow below steps to flush DNS cache.
- Press
Windows cardinal + Tenand select the Command Prompt (Admin) choice from the Ability User menu. - Type in the command
ipconfig /flushdnsand pressEnter

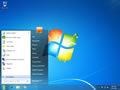
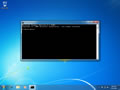
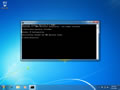
How to Flush DNS in Windows vii and Windows Vista?
To flush DNS on an upgraded version of Windows is almost every bit easy equally information technology is in the previous versions simply due to Microsoft'south upgraded security system requirements, you must run the command prompt with administrator privileges.
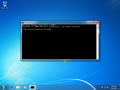
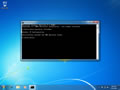
- To flush DNS through the
command prompt, navigate every bit shown (Get-go > All Programs > Accessories > Control Prompt) - to have
administrator privileges, you must doright click on the command promptawarding and chooseRun as Administrator. - Type in the command
ipconfig /flushdnsand pressEnter
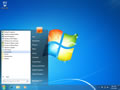

Shortcut
Type in
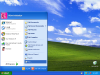
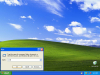
cmdinto the Windows Vista / Windows seven offset menu search field and soright clickon thecmd.exeresult instead of navigating through the various sub-menus.Windows 98/NT/2000/XP Flush DNS
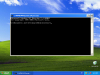
Given beneath steps will help you to clear your windows DNS enshroud.
- To access command prompt (
Commencement > Run >). - Type the
cmdand strikingEnter - In the CMD window that y'all just opened, Type in the control
ipconfig /flushdns

Mac Os
Flushing the DNS in Mac OS 10 is an piece of cake procedure, just the steps taken volition depend on which version of OS Ten is running equally your operating organisation. First, make certain y'all open the
Terminalon your reckoner. Once opened, run the control beneath that corresponds to your version of OS X.macOS 11 (Large Sur)
sudo dscacheutil -flushcache; sudo killall -HUP mDNSRespondermacOS x.xv (Catalina)
sudo killall -HUP mDNSRespondermacOS 10.14 (Mojave)
sudo killall -HUP mDNSRespondermacOS 10.xiii (High Sierra)
sudo killall -HUP mDNSResponderOS X 12 (Sierra) and afterwards
sudo killall -HUP mDNSResponder;sudo killall mDNSResponderHelper;sudo dscacheutil -flushcacheOS Ten 11 (El Capitan) and OS X 12 (Sierra)
sudo killall -HUP mDNSResponderOS 10 x.10 (Yosemite)
Versions 10.10.4+
sudo dscacheutil -flushcache;sudo killall -HUP mDNSResponderVersions 10.10.1, 10.10.2, 10.10.three
sudo discoveryutil udnsflushcachesBone 10 10.9 (Mavericks)
dscacheutil -flushcache; sudo killall -HUP mDNSResponderBone X 10.7 (King of beasts) and 10.8 (Mount Lion)
sudo killall -HUP mDNSResponderBone X 10.five (Leopard) and 10.six (Snow Leopard)
dscacheutil -flushcacheBone X 10.4 (Tiger)
lookupd -flushcacheLinux Flush DNS
Ubuntu & Debian
Nigh Ubuntu and Debian systems run a system that uses systemd-resolve daemon; you will need to do the post-obit.
- Open up a command terminal (either as root or run with sudo)
- Run the command in the terminal:
systemd-resolve --affluent-caches - Optional. You can verify that this ran correctly by running the command:
systemd-resolve --statistics
Others
If you are running the nscd Name Service Cache Daemon, then you lot volition demand to do the post-obit.
- Open up a
command concluding(either as root or run step 2 withsudo) - Run the command in the final:
/etc/init.d/nscd restart
Mobile Devices
iPhone
There are three options available to flush DNS cache in iPhone.
Toggle the Airplane style
The easiest solution is to toggle the Airplane style in iPhone. For this
- Open up the "Settings".
- You will meet the icon of an airplane. Click that to toggle on.
- Again click that icon to toggle off.
Reboot your iPhone
- Rebooting your device too clears your DNS cache.
Dump Network Settings
That will articulate your DNS cache only will also immediately disable your Wi-Fi connection.
- Open the "Settings".
- Click on "General".
- Click "Reset", so "Reset Network Settings".
- Your device is then rebooted.
iOS Devices
- Press and hold both the Sleep/Wake and Home buttons for at least 10 seconds, until you lot come across the Apple logo.
Android
Flush DNS cache in Chrome
Open up the Chrome browser
- In the URL bar, type in chrome://internet-internals/#dns
- In the left pane, click "DNS".
- In the correct pane, click the "Articulate host cache" button.
Clear the cache of your browser
In your android phone
- Go to Settings > Apps.
- Select the browser app y'all are using.
- Here go to "Storage" and tap on "Clear Cache".
Use Wi-Fi to Remove DNS Cache
- Settings on your Android device.
- Open up Wi-Fi and so long-press the network you desire to alter DNS for.
- Tap on "Modify network".
- A pop-upward will appear, and you need to tap on "Advanced options".
- Select IP settings as "Static". By default, information technology should be DHCP.
- Go to DNS settings and manually enter the DNS servers. It is better to use Google DNS.
- In DNS 1: enter the primary DNS server, and in DNS 2: enter the secondary DNS server.
- Save your settings.
TV Devices
- Step 1.
Close apps:Close the app completely. Make certain it is not running in the background as well. - Stride 2.
Open App:Open the app again. DNS Cache should is cleared.
Google Chrome Browser
This method can be used for the Chrome browser regardless of the operating system.
- First
Google Chrome. - In the address bar, type
chrome://internet-internals/#dns. Google Chrome displays a listing of hosts in itsinternal DNS cache. - Click
Clear host cache. - In the address bar, type
chrome://internet-internals/#sockets. - Click
Close idle sockets, and and then clickFlush socket pools.
For Webmasters/ Developers
DNS cache can exist cleared on the client-side, just the same can be done on DNS Serves aswell to speed upwards the DNS Propagation process. It tin be achieved in the following ways:
Public DNS services like Google, Cloudflare, OpenDNS, VeriSign enable users to asking a DNS flush for specific domains.
Google Public DNS:
- Visit Google'southward Public DNS Flush Cache folio.
- Yous'll encounter a folio with content similar to this:
-
Cloudflare Public DNS
- Visit the Cloudflare purge Enshroud folio.
- Yous'll run into a page with content like to this:
-
OpenDNS PublicDNS
- Visit the OpenDNS Cache check page.
- It will display DNS results from its multiple server locations. At the bottom, press the
Refresh The Cachepush button to clear the DNS enshroud.
Reduce TTL
- TTL can be defined in your DNS settings. DNS servers respect TTL and reducing TTL can speed up the process of DNS propagation when irresolute servers IP'southward of a web application.
- Windows

Source: https://dnschecker.org/flush-dns.php
Posted by: faulknerparge1989.blogspot.com
0 Response to "How Do I Clean Url Cache In Website Host Dns Server"
Post a Comment